This comprehensive guide provides step-by-step instructions on how to install the driver for your VCDS 409.1 KKL USB cable on various Windows operating systems, enabling you to use VCDS software for vehicle diagnostics.
While the VCDS 409.1 interface is functional, it has limitations. Its compatibility is restricted to older vehicles (typically pre-2004) and requires a paid upgrade from the free VCDS-Lite software to access full functionality. For broader compatibility and the latest features, consider a newer VCDS interface. However, if you have a VCDS 409.1, this guide will help you get it working.
Installing the VCDS 409.1 Driver
Important: Do not connect the cable to your computer until instructed.
Step 1: Download and Install the Driver Pack
Download the appropriate VAG-COM driver pack.
Windows Vista, 7, 8, 8.1, and 10:
- Unzip the downloaded driver pack file.
- Locate and double-click the “Install.exe” file to initiate the driver installation process.
- Once the installation is complete, connect the VCDS 409.1 cable to an available USB port on your computer.
- Windows should automatically detect and finalize the driver installation. If this doesn’t happen, proceed to the troubleshooting section below.
Windows XP:
- Unzip the downloaded driver pack file.
- Double-click “Install.exe” to begin the installation.
- Connect the cable to your computer’s USB port.
- The “Found New Hardware Wizard” will appear. Select “Yes” to allow Windows to search for the driver software online.
- Choose “Install the software automatically.”
- Click “Finish” after the installation completes.
- The “Found New Hardware Wizard” will launch again for a second driver component. Repeat steps 4-6.
- If the installation fails, refer to the troubleshooting steps below.
Troubleshooting Driver Installation Issues:
If the initial driver installation fails, try the following:
- Download an alternative driver pack (e.g., FTDI drivers).
- Extract the files to a convenient location on your computer.
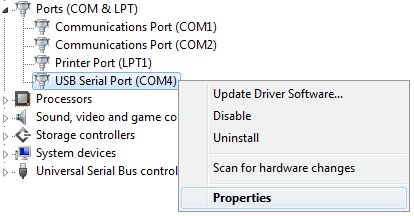
- With the VCDS 409.1 cable connected, open Device Manager (Control Panel > System > Device Manager on most Windows versions).
- Locate the “USB Serial Port” entry, often listed under “Other devices” or “Ports (COM & LPT).” It might have a yellow warning icon.
- Right-click on “USB Serial Port” and select “Update Driver Software.”
- Browse to the folder where you extracted the alternative driver pack and allow Windows to install the driver.
Identifying and Configuring the COM Port
Step 2: Determine the Assigned COM Port
- Open Device Manager.
- Expand “Ports (COM & LPT)” or “Other devices” to find the “USB Serial Port” associated with your VCDS 409.1 cable. Note the COM port number assigned to it (e.g., COM3).
- Important: If the COM port number is higher than 4, you must change it. VCDS-Lite often requires a COM port between 1 and 4.
Changing the COM Port Number (if necessary):
- Right-click on “USB Serial Port” in Device Manager and select “Properties.”
- Go to the “Port Settings” tab and click “Advanced.”
- Under “COM Port Number,” select an available COM port between 1 and 4.
- Click “OK” to save the changes.
Testing the VCDS 409.1 Connection
Step 3: Verify the Connection
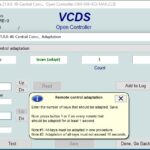
- Launch the VCDS-Lite software.
- Click “Options.”
- In the “Select COM Port” box, choose the COM port number you identified or configured in Step 2.
- Click the “Test” button. A successful test will display “Interface Status: Found!”
You can now connect the cable to your vehicle’s OBD-II port with the ignition turned on and begin using VCDS-Lite. If the test fails, review the troubleshooting tips in the original article. Remember that the VCDS 409.1 cable has limitations and may not work with all vehicles.