
This guide provides a comprehensive walkthrough for downloading, installing, and troubleshooting free VCDS software for VAG-COM diagnostic interfaces. Whether you’re using version 23.11.0, 24.07.0, or earlier, the fundamental installation process remains consistent. You’ll primarily be working with the executable file: VCDS-Release-XXXX-installer.exe (ENG version) or the latest version VCDS-FRM-24070-installer.exe (FR version). This software is essential for utilizing your VCDS HEX-V2 interface cable.
Downloading Free VCDS Software
Free VCDS software downloads are available on various online platforms. Ensure you choose the correct version compatible with your cable’s chip and loader (consult your seller if unsure).
Installation Steps
Initial Setup
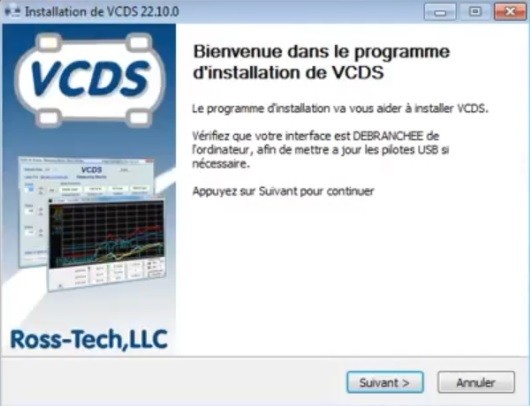
- Run the VCDS installer executable file (e.g., VCDS-FRM-XXXX.exe).
- Accept the terms and conditions.
- Proceed through the installation wizard, ensuring the drivers for your VCDS interface (HEX-USB/HEX-V2) are selected.
- Keep the default installation path (recommended).
- Important: Disconnect the interface before proceeding with driver updates.
Software Installation
The software installation will take a few minutes depending on your PC’s performance.
Driver Installation
- After the software installation, the HEX-V2 device driver installation wizard will launch.
- Allow the USB drivers to install.
- Crucial: Upon completion, uncheck “Launch VCDS” before clicking “Close”. For clone cables, always install the loader first.
Loader Installation (For Clone Cables)
Disable your antivirus temporarily to prevent it from blocking the loader.
4A. VIIPlusLOADER (for STM32F405/429 ARM Chip Cables):
- Extract the VIIPlusLoader installer from the downloaded archive.
- Run the installer and follow the prompts.
- Install/Repair Microsoft Visual C++ if prompted.
- After successful installation, a loader shortcut will be created on your desktop. Launch VCDS only through VIIPlusLoader. Never launch VCDS directly.
4B. VCDSLoader Kolimer (for ATMEGA162 Chip Cables):
- Important: This cable should not be connected to the internet.
- Disable antivirus and block VCDS in your firewall.
- Copy
VCDSLoader.exeinto the VCDS installation directory (e.g., C:Ross-TechVCDS). - Create a desktop shortcut for
VCDSLoader.exe. Launch VCDS only through this shortcut. - Connect the cable to your car after closing VCDS the first time and run
VCDSLoader.exeagain. An “OK” message indicates VCDS is ready.
First Launch and Troubleshooting
First Launch
- On the first launch, do not click “VCDS: Outdated Version”. Close the pop-up.
- Go to “Options” -> “First Use”.
- With the cable connected to the car, click “Test” with “USB” checked.
- Click “Save” and then “Apply”.
Troubleshooting
“Interface Not Found”: Ensure correct loader for your chip (ATMEGA or STM), check USB drivers, and update Windows. Disable “Memory Integrity” in Windows Security settings if necessary.
“License Not Authorized”: Uninstall VCDS and drivers, use CCleaner to clean the registry, restart your PC, disable antivirus, reinstall VCDS, and verify antivirus exclusion rules for the VCDS folder.
“Outdated Version”: This is informational, not an error. Close the pop-up. Do not update if you have a clone cable. You can disable update notifications in “Options” -> “User Interface and Identification”.
Antivirus Issues: If the loader is deleted, restore it from the antivirus quarantine and add an exclusion for the VCDS directory.
This guide provides a foundation for using free VCDS software. If you encounter persistent issues, consult online forums or seek professional assistance.