A Vcds Auto Scan is a crucial diagnostic procedure for Volkswagen, Audi, Seat, and Skoda vehicles. It allows you to quickly identify and troubleshoot potential issues by systematically checking all the control modules in your car. This guide provides a step-by-step walkthrough of how to perform a VCDS auto scan and interpret the results.
Understanding the VCDS Auto Scan Process
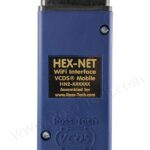
The VCDS (VAG-COM Diagnostic System) software communicates with your car’s onboard computer systems through a specialized interface cable. The auto scan function queries each control module, retrieving vital information such as:
- Part Numbers: Identifying the specific hardware components.
- Component Numbers: Providing further details about the module’s function.
- Software Coding: Revealing the software version installed on the module.
- WSC (Workshop Code): Indicating the workshop that originally coded the module.
- Fault Codes (DTCs): Pinpointing specific malfunctions within the system. This is the core function of the VCDS auto scan.
Initiating a VCDS Auto Scan
Before starting the scan, you need to select the correct Chassis Type for your vehicle. This ensures that VCDS only scans for modules that are likely present in your car, optimizing the scan time. The Chassis Type is usually derived from the 7th and 8th digits of your VIN. Alternatively, the Auto Detect (CAN Only) option automatically identifies the installed modules on newer, fully CAN-based systems.
You can customize the scan further with these options:
- UDS Aggressive Mode: Enabled by default, this mode retrieves all fault codes, including those not typically shown by factory scan tools.
- Display Freeze Frame Data: Includes a snapshot of vehicle data at the time a fault code was logged.
Clicking the [Start] button initiates the auto scan. The process can take several minutes depending on the number of modules in your vehicle.
Interpreting VCDS Auto Scan Results
During the scan, VCDS cycles through each controller, displaying its status and any detected fault codes. The results include:
- Hardware and Software Part Numbers: For precise module identification.
- ROD Files and Label Files: Indicating the data files used for communication and coding. Special characters before Label Files indicate the type of coding available:
*: Experimental Coding.: Coding from the Label File|: Both Coding from the Label File and Experimental Coding
Double-clicking on a module highlighted in red indicates the presence of fault codes. You can then access the Fault Codes screen for that module to view details and clear the codes.
Managing Auto Scan Data
VCDS offers several options for managing the scan results:
- Copy: Copies the results to the clipboard for pasting into other applications.
- Print: Sends the results to your printer.
- Save: Saves the results to a file in the VCDSLogs directory. Note: VCDS automatically saves a copy of the scan in the Scans folder.
- Clear: Clears the displayed results without erasing the fault codes from the controllers.
The Gateway Installation List, available on CAN-based vehicles, provides a quick overview of installed modules and their status. Double-clicking a module opens its respective diagnostic screen.
Clearing Fault Codes
To clear fault codes, you can:
- Individually access each module with fault codes and clear them.
- Use the [Clear All DTCs] function, which efficiently clears codes from all modules, especially on CAN-based systems.
Performing a VCDS auto scan is a powerful tool for diagnosing and resolving issues in your VW/Audi vehicle. Understanding the process and interpreting the results will enable you to maintain your car effectively.


