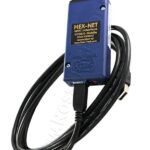
VCDS (Vag-Com Diagnostic System) with full options offers a powerful suite of features for in-depth diagnostics and customizations on Volkswagen, Audi, Seat, and Skoda vehicles. Understanding these options is crucial for maximizing the tool’s potential. This guide explores the various settings and configurations available within VCDS, empowering you to utilize its full capabilities.
Navigating VCDS Options
VCDS options are organized into tabbed sections, accessible upon initial software launch. These settings govern communication protocols, user interface elements, and identification parameters.
Port and Protocol Options
Selecting the Right Port:
This crucial first step involves identifying the COM port (for serial connections) or USB port for your interface adapter. Ensure your vehicle’s ignition is on and the interface is connected. The [Test] button verifies connectivity and displays results indicating the health of the connection and interface.
HEX-NET and HEX-V2 interfaces offer more detailed test results, including voltage checks. “Short to Ground” or “Short to +12V” results indicate potential wiring issues within the vehicle’s diagnostic port.
[LEDs] and [Config] Buttons:
Legacy interfaces feature an [LEDs] button, triggering a blink sequence on the interface for troubleshooting. HEX-NET and HEX-V2 utilize the [Config] button to access firmware updates, registration, and WiFi settings.
Fine-Tuning Protocol Options:
Parameters like Start Baud, KW2 Delay, and TST Addr. are generally best left at default values. Adjusting these settings may be necessary in specific troubleshooting scenarios under the guidance of Ross-Tech support. Debug Level controls diagnostic logging, while Blk Int, Char Int 2K/Char Int, and KP2 Time influence data sampling rates. CAN Timeout governs communication response times. Modifying these requires careful consideration as it can impact communication stability.
Initialization Parameters:
Options like “Bypass OBD-II Fastinit,” “Force K on Engine,” and “Bypass CAN Init” address specific communication challenges. “Boot in intelligent mode” (or “Forced Dumb Mode”) determines the interface’s baud rate detection behavior. “Reduce CPU Usage” options optimize performance but might slightly reduce data sampling rates.
User Interface and Identification
Workshop Identification:
This section allows inputting Shop Name, Workshop Code (WSC), VZ/Importer number, and Equipment Number. Independent users can typically leave these at default values. Dealerships should use their specific codes.
User Interface Customization:
Adjust “Left Margin Printing” for report formatting. “Window Size” modifies the VCDS window dimensions. “Disable Sounds” silences operation completion notifications. “Prevent screen power savings” keeps the screen active during diagnostics. “Build list of CAN controllers” determines how the controller selection dialog populates.
Update Management:
VCDS offers automatic update checks, configurable through a dropdown menu. Manual checks are also possible via the [Check for updates now] button.
Saving and Applying Changes
[Save] stores the current options permanently. [Apply] enables testing changes without saving. [Cancel] discards modifications and returns to the main screen.
By understanding and correctly configuring these Vcds Full Options, you can ensure optimal performance and unlock the full diagnostic potential of this essential tool. For specific troubleshooting or advanced configuration guidance, consult Ross-Tech’s official documentation and support resources.

