The sudden appearance of a check engine light can be unsettling, especially when you’re on the road. While it might trigger immediate concern, in many instances, it signals a minor issue rather than a major engine breakdown. The check engine light system is connected to your car’s powertrain, encompassing the engine, transmission, and emission controls. It could be something as simple as a loose gas cap or a failing sensor. However, even if your car seems to be running fine, it’s wise not to dismiss it immediately as it could potentially indicate issues that might lead to costly repairs down the line.
Since the 1980s, vehicles have been equipped with an onboard diagnostics (OBD) system. This system is designed to monitor your car’s performance, identify potential problems, and store diagnostic trouble codes (DTCs). Typically, these codes are accessed using an OBD-II scanner, which helps mechanics and car owners pinpoint the cause of the check engine light. But what if you don’t have a scan tool handy?
This guide will explore methods on how to read check engine light codes without a scan tool, empowering you to understand your vehicle’s issues and decide on the next steps.
Understanding Your Check Engine Light
Before diving into methods to retrieve codes without a scanner, it’s important to understand what your check engine light is telling you through its behavior. The way your check engine light illuminates provides initial clues about the severity of the problem.
Solid Yellow or Orange Check Engine Light: A steady yellow or orange light indicates that the OBD system has detected a malfunction in some component or system. The issue requires attention, but it’s generally not considered an emergency. You likely have some time before needing immediate professional service. It’s advisable to investigate the issue within a reasonable timeframe, ideally within 100 miles of driving, to prevent potential further complications.
Solid Red Check Engine Light: A solid red check engine light, without flashing, suggests a more urgent issue that needs prompt attention but is not immediately catastrophic. It is recommended to take your vehicle to a certified mechanic or repair shop as soon as possible for diagnosis and repair.
Flashing Check Engine Light: A blinking or flashing check engine light is a serious warning sign, often indicating an engine misfire. This can cause significant damage to the catalytic converter and potentially other engine components. In this situation, it is crucial to pull over to a safe location immediately and seek professional assistance, such as roadside assistance or towing to a qualified repair facility.
Dashboard check engine light symbol illuminated in yellow, indicating a detected car issue.
Reading OBD2 Codes with a Scan Tool: The Standard Method
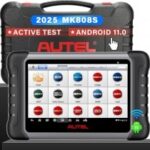
While this article focuses on methods without a scan tool, it’s worth briefly mentioning the easiest and most common way to read OBD2 codes – using a scanner. OBD-II scanners are readily available at auto parts stores and online, and many auto shops offer free code reading services. These tools plug into your car’s OBD2 port, usually located under the dashboard on the driver’s side.
Here’s how to use an OBD2 scanner:
- Locate the OBD2 Port: Find the OBD2 port, typically beneath the steering wheel column.
- Plug in the Scanner: Connect the OBD2 scanner to the port.
- Turn on Ignition: Turn your car’s ignition to the “on” position, without starting the engine.
- Follow Scanner Prompts: The scanner will power up and may ask for vehicle information like VIN.
- Initiate Scan: Select the “scan” or “read codes” option on the scanner.
- Record Codes: The scanner will display diagnostic trouble codes (DTCs). Write these codes down for further investigation.
Many scanners also allow you to clear codes after repairs. However, remember that clearing a code doesn’t fix the underlying problem. If the issue persists, the check engine light will reappear.
Alternative Methods: Reading Engine Codes Without a Scan Tool
If you find yourself without an OBD2 scanner, there are a few alternative methods you can try to retrieve diagnostic trouble codes. These methods may not work for all vehicles and can be less precise than using a scan tool, but they can provide a starting point.
Method 1: The Odometer Reset Technique
Some vehicles allow you to access diagnostic codes through a sequence involving the odometer reset button and the ignition. This method may vary depending on the car manufacturer and model, but here’s a general approach:
- Press and Hold Reset Button: Press and hold the odometer reset button.
- Press and Hold Trip Button: While holding the reset button, also press and hold the odometer trip button.
- Turn Ignition to “On”: Keeping both buttons pressed, turn the ignition switch to the “on” position (do not start the engine).
- Release Buttons: Release both the odometer reset and trip buttons.
- Observe Odometer Display: The diagnostic trouble codes, if accessible through this method, should appear in the odometer display. Record any codes shown.
Close-up of a car odometer showing the digital mileage display.
Method 2: Multiple Ignition Cycle Method
If the first odometer method doesn’t work, another variation involves cycling the ignition multiple times. This method also utilizes the odometer reset and trip buttons:
- Press and Hold Buttons: Press and hold both the odometer reset and trip buttons simultaneously.
- Ignition to “On”: While holding the buttons, turn the ignition switch to the “on” position.
- Ignition to “Off”: Without releasing the buttons, turn the ignition switch back to the “off” position.
- Ignition Back to “On”: Again, without releasing the buttons, turn the ignition switch back to the “on” position.
- Release Buttons and Observe: Release the odometer buttons while the ignition remains in the “on” position. Check the odometer display for any diagnostic trouble codes.
Method 3: The Ignition Key and Dashboard Light Pulse Count (OBD1)
For older vehicles, particularly those with OBD-1 systems, you might be able to read codes by observing the pulses of the check engine light itself. This method requires careful attention to the blinking patterns.
- Ignition Cycle: Turn the ignition key from “on” to “off” three to five times in quick succession, ending with the ignition in the “on” position (engine off).
- Warning Lights Illuminate: If done correctly, all dashboard warning lights should illuminate briefly.
- Observe Check Engine Light: Watch for all lights to turn off except the check engine light.
- Check Odometer (OBD2): For OBD2 vehicles, a DTC might appear in the odometer display as in previous methods.
- Count Light Pulses (OBD1): If no code appears in the odometer, carefully observe the check engine light. It will blink in a pattern of pulses and pauses. Each pulse represents a digit, and a longer pause separates the digits of a multi-digit code. For example, “pulse, pulse, pause, pulse, pulse, pulse” would be code 23. Record the sequence of pulses to determine the trouble code.
Image of a car key inserted into the ignition switch of a vehicle.
Method 4: The Paperclip or Jumper Wire Method (OBD1)
For older OBD-1 systems, a paperclip or jumper wire can be used to bridge specific terminals in the OBD port, triggering the system to flash the codes through the check engine light.
- Vehicle Off: Ensure the car is completely turned off.
- Locate OBD Port Terminals: Find the OBD-1 diagnostic port, typically located under the dashboard or in the engine bay. Identify the diagnostic terminals – you may need your vehicle’s repair manual to identify the correct terminals for code retrieval.
- Create a Circuit: Using a paperclip or jumper wire, carefully connect (bridge) the designated diagnostic terminals in the OBD port.
- Ignition to “On”: Turn the ignition switch to the “on” position, without starting the engine.
- Observe Light Pulses: Watch the check engine light and record the pattern of pulses and pauses, as described in Method 3, to decipher the diagnostic trouble code.
Important Note: Incorrectly bridging terminals in the OBD port can potentially damage your vehicle’s electrical system. Consult your vehicle’s repair manual or a reliable online resource specific to your car model to ensure you are using the correct terminals and procedure. If you are uncomfortable or unsure, it’s best to avoid this method and seek professional help.
Limitations of DIY Code Reading and When to Seek Professional Help
While these methods can sometimes provide you with check engine light codes without a scan tool, they have limitations:
- Not Universally Applicable: These methods don’t work on all vehicles, especially newer models that rely heavily on digital communication.
- Less Accurate: Pulse counting and interpreting odometer displays can be prone to errors compared to the precise output of a scan tool.
- Limited Information: Even when you get a code, it’s often a generic code, not providing the detailed context and specific troubleshooting information that a professional scan tool and diagnostic process can offer.
When to See a Professional:
- Flashing Check Engine Light: Always seek immediate professional help for a flashing check engine light.
- Persistent Codes: If the check engine light returns quickly after you’ve tried to address a problem, professional diagnosis is needed.
- Complex Issues: If you’re unsure about the meaning of the codes or how to proceed with repairs, consult a qualified mechanic.
- For Accurate Diagnosis: For a precise and reliable diagnosis, using an OBD-II scanner or taking your vehicle to a professional auto repair shop is always recommended. Certified mechanics have advanced diagnostic tools and expertise to accurately pinpoint the problem and perform the necessary repairs.
Conclusion: Informed DIY vs. Professional Expertise
Knowing how to check engine light codes without a scan tool can be a useful skill for initial troubleshooting and gaining a basic understanding of potential car issues. These DIY methods can be helpful in a pinch or for preliminary checks. However, they should not replace professional diagnostics, especially for serious or persistent problems.
For accurate diagnosis and reliable repairs, especially for complex car issues indicated by the check engine light, utilizing an OBD-II scanner or consulting a certified mechanic is the most effective approach. This ensures that problems are correctly identified and resolved, keeping your vehicle running safely and efficiently.