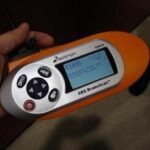
Navigating the world of automotive diagnostics often leads to the necessity of specialized tools, particularly when dealing with General Motors vehicles. The GM Tech 2 scan tool has long been a standard for professionals and serious enthusiasts alike. While the market offers various versions, including more affordable alternatives, understanding the nuances of a Complete Gm Tech 2 Scan Tool setup is crucial. This article delves into practical user experiences and essential tips for getting the most out of your GM Tech 2 scan tool, especially for those opting for aftermarket solutions.
Initial setup of a GM Tech 2 scan tool can present some unexpected quirks, as highlighted by user experiences. One area of concern is the Vehicle Communication Interface (VCI) connector. It’s tempting to modify connectors for an easier fit, but user feedback cautions against over-enthusiasm. A snug connector fit is actually preferable. This tightness ensures the VCI lock-down handle properly secures the connection, preventing accidental loosening that could damage the connector or interrupt data flow during critical operations like reprogramming or diagnostics. While OEM GM Tech 2 tools are manufactured to exacting tolerances, aftermarket versions may have slight variations. However, these minor differences are often negligible compared to the significant cost savings. Focus on the functionality – a secure 16-pin DLC connection that allows the scan tool to perform diagnostics effectively is paramount.
Another initial hurdle users encounter is the labeling process. Unlike the straightforward plug-and-play experience many hope for, some GM Tech 2 scan tools require manual application of labels to the Vetronix “GYMKO” and CANDi devices. This process can be surprisingly delicate. These aren’t simple stickers; they often feature partially opaque windows designed to overlay specific numeric sub-labels. Precise placement is key. Users recommend a slow and careful approach, likening it to a detail-oriented task requiring patience and a steady hand. Starting with the “GM” logo appliqué label above the blue screen can serve as practice to gauge the required precision. If misalignment occurs, gently peel back and retry. For the sub-labels under the opaque windows, transparent scotch tape can be a helpful aid to keep them in position during main label application. This peculiar labeling requirement seems to be an effort to closely mirror the aesthetics of the original GM OEM Tech2 tools, which utilized durable labels suited for demanding workshop environments.
 DSC01628.jpg
Beyond connectors and labels, even the carry case of a complete GM Tech 2 scan tool can hold a minor surprise. Users have noted that the Velcro safety belt handles are often installed backward at the factory. Upon unboxing, check the orientation. Reversing them so the soft leather backing faces outward when gripping the handle improves comfort and prevents the toothed plastic Velcro side from digging into your hands. This simple correction enhances the usability of the tool right from the start.
Despite these initial setup considerations, user experiences confirm that aftermarket GM Tech 2 scan tools are capable of performing on par with their OEM counterparts in terms of diagnostic capabilities. The crucial aspect is the functionality of the 16-PIN DLC connector and the tool’s ability to communicate effectively with GM vehicle systems. Minor cosmetic or assembly quirks are often outweighed by the tool’s diagnostic prowess and affordability. Once connected to a vehicle and engaged in diagnosing real-world issues, these initial minor inconveniences quickly fade into insignificance.
In conclusion, while setting up a complete GM Tech 2 scan tool, particularly an aftermarket version, may require a bit of patience with labeling and attention to connector snugness and handle orientation, the payoff is a powerful diagnostic tool at a fraction of the OEM cost. By understanding these initial setup nuances, users can ensure a smooth start and confidently leverage the full potential of their GM Tech 2 scan tool for comprehensive vehicle diagnostics and repairs.