
Ensuring your NVIDIA graphics card drivers are up to date is crucial for optimal performance, whether you’re a gamer, content creator, or simply want your system to run smoothly. Outdated drivers can lead to performance issues, bugs, and even system instability. Fortunately, NVIDIA provides a seamless solution called the NVIDIA Smart Scan tool to automatically detect and update your graphics drivers. This guide will walk you through how to Download Nvidia Smart Scan Tool and use it to keep your system running at its best.
Updating your NVIDIA drivers doesn’t have to be a complicated process. NVIDIA offers user-friendly methods, including the NVIDIA Control Panel and the NVIDIA Smart Scan feature, to simplify driver updates on Windows 10, Windows 11, and even older Windows versions. Let’s explore how to utilize these tools to ensure you have the latest drivers.
Updating NVIDIA Graphics Drivers Using NVIDIA Control Panel and Smart Scan
The NVIDIA Control Panel provides a direct pathway to access the NVIDIA Smart Scan functionality. Here’s how you can update your drivers using this method:
-
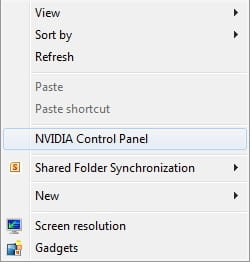
Open NVIDIA Control Panel: Begin by right-clicking on your desktop. In the context menu that appears, select “NVIDIA Control Panel“. This action will launch the NVIDIA Control Panel interface.
-
Navigate to Driver Download: Within the NVIDIA Control Panel window, locate and click on the “Home” button, typically found at the top. Then, click on “Download drivers and software“. This option will redirect you to NVIDIA’s driver download section.
-
Access NVIDIA Driver Download Page: Clicking “Download drivers and software” will open your default web browser and take you to the official NVIDIA Driver Downloads page.
-
Initiate Automatic Driver Scan: On the NVIDIA Driver Downloads page, you’ll see two options: manual driver search and automatic driver detection. Choose the “Automatically find the drivers for my Nvidia products” option, usually labeled as Option 2. Then, click on the “Graphics Drivers” button.
-
Run NVIDIA Smart Scan: Clicking “Graphics Drivers” will launch the NVIDIA Smart Scan. You might be prompted to allow the installation of the “wsdetect.dll” add-in or a similar browser extension. Accept this installation to allow the scan to proceed. The NVIDIA Smart Scan will then automatically detect your graphics card and current driver version.
-
Download and Install Latest Drivers: Once the scan is complete, the NVIDIA Smart Scan tool will display the latest available driver compatible with your NVIDIA graphics card. You will be provided with a download link to get the most recent driver. Follow the on-screen instructions to download and install the latest drivers.
By following these steps, you can easily download NVIDIA Smart Scan tool functionality through the NVIDIA website and update your graphics drivers, ensuring optimal performance and stability for your system.
Automatic NVIDIA Driver Updates with NVIDIA Update
In addition to the Smart Scan tool, NVIDIA also offers the NVIDIA Update tool, which provides automatic notifications for new driver updates. This tool is bundled with modern NVIDIA GeForce and ION GPU drivers and proactively alerts you when new drivers are available for both desktop and laptop PCs.
The NVIDIA Update tool can be configured to automatically check for updates at set intervals, ensuring you always have the latest drivers without manually initiating the update process each time.
How to Get NVIDIA Update Tool
The NVIDIA Update tool is included when you manually download GeForce or ION graphics card drivers version 270 or later from the official NVIDIA website. During the driver installation process, you will be given the option to install NVIDIA Update. Make sure to select this option to enable automatic driver update notifications.
Configuring NVIDIA Update Settings
You can easily configure the NVIDIA Update tool to customize how and when you receive driver update notifications. Here’s how:
-
Access NVIDIA Update Settings: Right-click on the NVIDIA logo icon located in your Windows taskbar notification area (system tray).
-
Open Update Control Panel: From the context menu, select “Check for Updates” or “Update Settings“. This will open the NVIDIA Update control panel.
-
Customize Update Preferences: In the NVIDIA Update control panel, navigate to the “Settings” tab. Here, you can enable or disable automatic updates by toggling the “Automatically check for updates” checkbox. You can also adjust the frequency at which your system checks for driver updates using the provided interval settings.
By utilizing either the NVIDIA Smart Scan tool through the NVIDIA website or the automatic NVIDIA Update tool, you can ensure your NVIDIA graphics drivers are always up-to-date, contributing to a smoother and more efficient computing experience. Choose the method that best suits your needs and enjoy the benefits of optimized graphics performance.