
Windows 10, like any operating system, can encounter issues, including corrupted system files. While Windows 10 has built-in tools to scan and repair your PC, such as System File Checker (SFC) and DISM, sometimes manual intervention is necessary. This guide provides step-by-step instructions on how to manually replace corrupted system files in Windows 10, ensuring your system runs smoothly.
When automated PC scan and repair tools fail to fix corrupted files, or when you’ve identified a specific corrupted system file from log files, manual replacement becomes a viable solution. This process involves taking ownership of the corrupted file, granting administrator access, and then replacing it with a known good copy.
Step-by-Step Manual File Replacement
Here’s how to manually replace a corrupted system file in Windows 10:
Step 1: Take Administrative Ownership
First, you need to take administrative ownership of the corrupted system file. Open Command Prompt as an administrator and type the following command, replacing with the actual path and filename of the corrupted file:
takeown /f <path and filename of corrupted file>For example, if the corrupted file is jscript.dll located in System32, the command would be:
takeown /f C:windowssystem32jscript.dllThis command grants you, as the administrator, ownership of the file, allowing you to modify its permissions.
Step 2: Grant Administrators Full Access
Next, you need to grant administrators group full access to the corrupted system file. In the same elevated Command Prompt, type the following command, again replacing with the path and filename:
icacls <path and filename of corrupted file> /grant administrators:FUsing the same example of jscript.dll, the command would be:
icacls C:windowssystem32jscript.dll /grant administrators:FThis command provides the Administrators group with full control permissions over the file, which is necessary for replacing it.
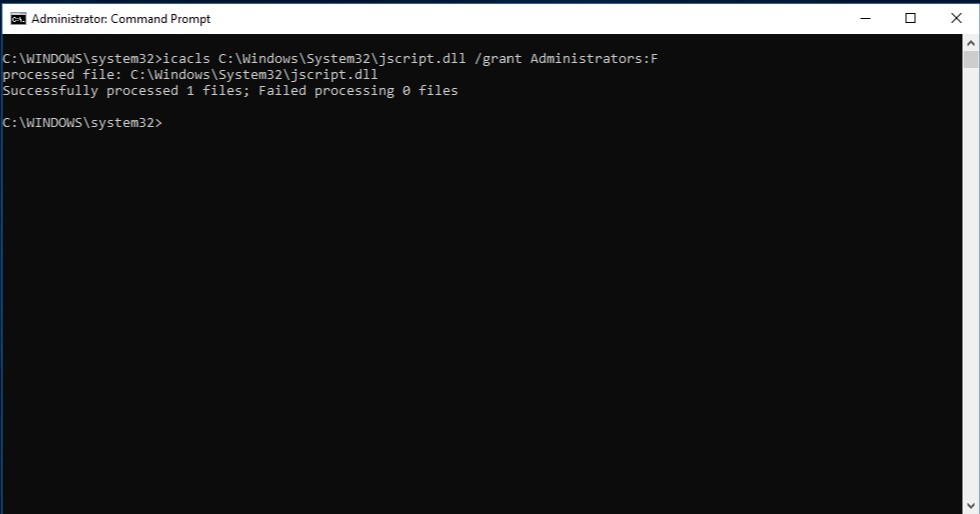 Command Prompt for Admin Rights to Repair Windows 10 File
Step 3: Replace the Corrupted System File
Now you can replace the corrupted file with a known good copy. You can obtain a good copy from another computer running the same version of Windows 10. It’s advisable to run the System File Checker (SFC /scannow) on that computer to ensure the file you are copying is healthy.
Use the copy command in the Command Prompt to replace the file. The syntax is:
Copy <path of good copy of file> <path of corrupted file>For example, if you have a good copy of jscript.dll on a USB drive (drive E:, in a temp folder), and the corrupted file is in System32, the command would be:
copy E:tempjscript.dll C:windowssystem32jscript.dllThis command copies the good file to the location of the corrupted file, effectively replacing it.
Conclusion
Manually replacing corrupted system files can be an effective solution when standard PC scan and repair tools in Windows 10 are insufficient. By following these steps to take ownership, grant permissions, and replace the file, you can resolve system file corruption issues.
If these steps do not resolve your problem, further troubleshooting or a Windows 10 reinstallation might be necessary. For more comprehensive recovery options, refer to Recovery options in Windows. Remember to always exercise caution when modifying system files and ensure you have a backup of your important data.