
While PC scan and repair tools can automatically fix many computer issues, sometimes manual intervention is necessary, especially when dealing with corrupted system files that automated tools can’t handle. This guide provides advanced steps to manually replace corrupted system files in Windows, ensuring a robust repair process when automatic solutions fall short.
Step 1: Take Administrative Ownership of the Corrupted System File
To modify a protected system file, you first need to take ownership. Open Command Prompt as an administrator and use the takeown command. Replace <corrupted_file_path> with the actual path to your corrupted file.
takeown /f <corrupted_file_path>For example:
takeown /f C:windowssystem32jscript.dllStep 2: Grant Administrators Full Access
After taking ownership, grant administrators full control over the file using the icacls command. This allows you to replace the file.
icacls <corrupted_file_path> /grant administrators:FExample:
icacls C:windowssystem32jscript.dll /grant administrators:F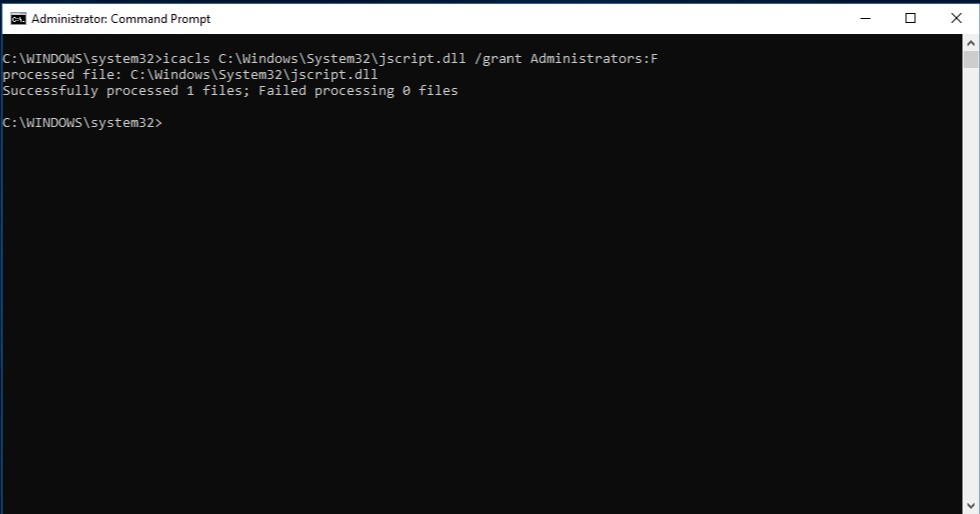 Administrator Command Prompt for manual PC system file repair, an advanced technique beyond automatic scan tools.
Step 3: Replace the Corrupted File
Now, replace the corrupted file with a known good copy. You can obtain a good copy from another computer running the same Windows version or from a backup. Use the copy command, replacing <good_file_path> and <corrupted_file_path> with the appropriate paths.
copy <good_file_path> <corrupted_file_path>Example:
copy E:tempjscript.dll C:windowssystem32jscript.dllManually replacing system files is an advanced PC repair technique that goes beyond typical scan and repair tools. It’s crucial to ensure you are replacing the file with a correct, uncorrupted version. If these steps seem daunting, consider exploring Windows recovery options or seeking professional assistance for comprehensive PC scan and repair.