Encountering error messages about corrupted system files can be a frustrating experience for any Windows user. While Scan And Repair Tools are often the first line of defense, sometimes a more hands-on approach is necessary. This article will guide you through the process of manually replacing corrupted system files in Windows, ensuring your system runs smoothly.
When automated scan and repair tools fail to fix the issue, or when you need to replace a specific corrupted file, manual replacement becomes a valuable skill. This method involves identifying the corrupted file, taking ownership, granting administrative permissions, and finally, replacing it with a known good copy.
Before proceeding, it’s crucial to understand that modifying system files requires caution. Incorrect steps can lead to system instability. Ensure you follow these instructions precisely.
Step-by-Step Guide to Manual System File Repair
This guide provides a detailed walkthrough of manually replacing a corrupted system file.
Step 1: Taking Administrative Ownership of the Corrupted System File
To modify a system file, you first need to take ownership of it. This is done using the takeown command in an elevated Command Prompt.
-
Open Command Prompt as an administrator. Search for “cmd” in the Start Menu, right-click “Command Prompt”, and select “Run as administrator”.
-
In the elevated Command Prompt, type the following command and press ENTER, replacing
<corrupted_file_path>with the actual path and filename of the corrupted file:takeown /f <corrupted_file_path>Example: If the corrupted file is
jscript.dlllocated inC:windowssystem32, the command would be:takeown /f C:windowssystem32jscript.dllThis command grants you, as the administrator, ownership of the file, allowing you to modify its permissions.
Step 2: Granting Administrators Full Access to the Corrupted System File
After taking ownership, you need to grant administrators full access to the file. This allows you to make changes, including replacing the file. Use the icacls command for this.
-
In the same elevated Command Prompt, type the following command and press ENTER, again replacing
<corrupted_file_path>with the correct path:icacls <corrupted_file_path> /grant administrators:FExample (continuing with
jscript.dll):icacls C:windowssystem32jscript.dll /grant administrators:FThis command grants the “administrators” group full control (
:F) over the specified file.
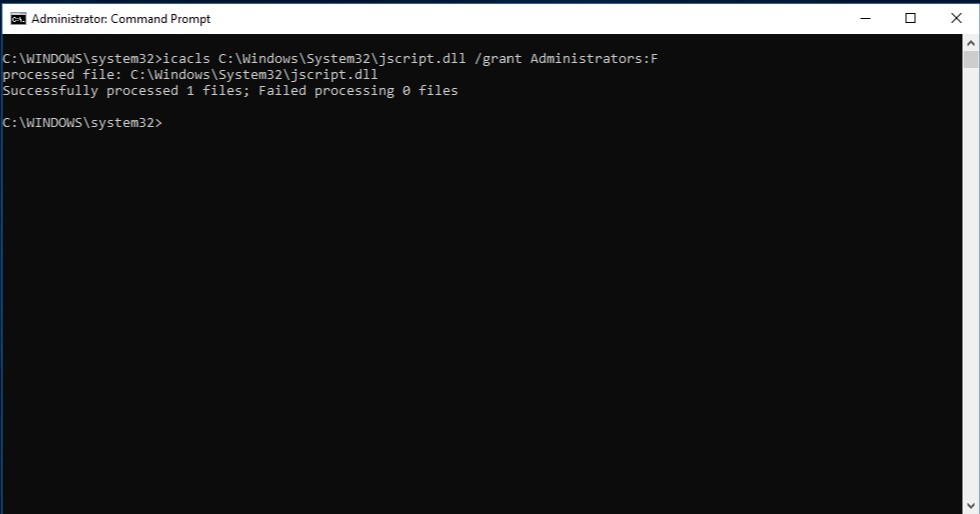 Command Prompt window showing commands for manual system file repair, an alternative to using a scan and repair tool.
Step 3: Replacing the Corrupted System File with a Known Good Copy
With ownership and permissions set, you can now replace the corrupted file. You’ll need a known good copy of the file, ideally from another computer running the same version of Windows. You can also use System File Checker on a healthy computer to ensure the copy is valid.
-
Use the
copycommand to replace the corrupted file. In the elevated Command Prompt, type:copy <path_to_good_copy> <corrupted_file_path>Replace
<path_to_good_copy>with the path to the good file copy and<corrupted_file_path>with the path to the corrupted file.Example: If you have a good copy of
jscript.dllon a USB drive atE:temp, the command would be:copy E:tempjscript.dll C:windowssystem32jscript.dllThis command copies the good file to the location of the corrupted file, effectively replacing it.
Conclusion: Manual Repair as a Powerful Technique
Manually replacing corrupted system files is a powerful troubleshooting technique when standard scan and repair tools fall short. By carefully following these steps, you can address specific file corruption issues and restore your Windows system’s stability.
However, if these steps don’t resolve the problem, reinstalling Windows might be necessary. For further assistance, refer to Recovery options in Windows for more comprehensive recovery solutions. Remember to always exercise caution when modifying system files and ensure you have a backup of your important data.