
A corrupted system file can severely impact your computer’s performance. Identifying and replacing these files is crucial for restoring functionality. This guide provides a detailed walkthrough of Scan Tool Operation, specifically focusing on replacing corrupted system files after a scan has identified the issue. This process involves taking ownership and granting access permissions before replacing the file.
Understanding File Ownership and Permissions in Scan Tool Operation
Before replacing a corrupted system file, you need administrative control. This involves two key steps: taking ownership of the file and granting full access permissions to administrators. These steps are essential for scan tool operation and ensure you have the necessary privileges to modify system files.
Taking Ownership of the Corrupted File
The first step in scan tool operation for file replacement is taking ownership. This command assigns ownership of the corrupted file to the administrator account:
takeown /f <file path and name>Example:
takeown /f C:windowssystem32jscript.dllThis command tells the system that the administrator account now controls the file’s permissions. This is a critical step before proceeding with any modifications.
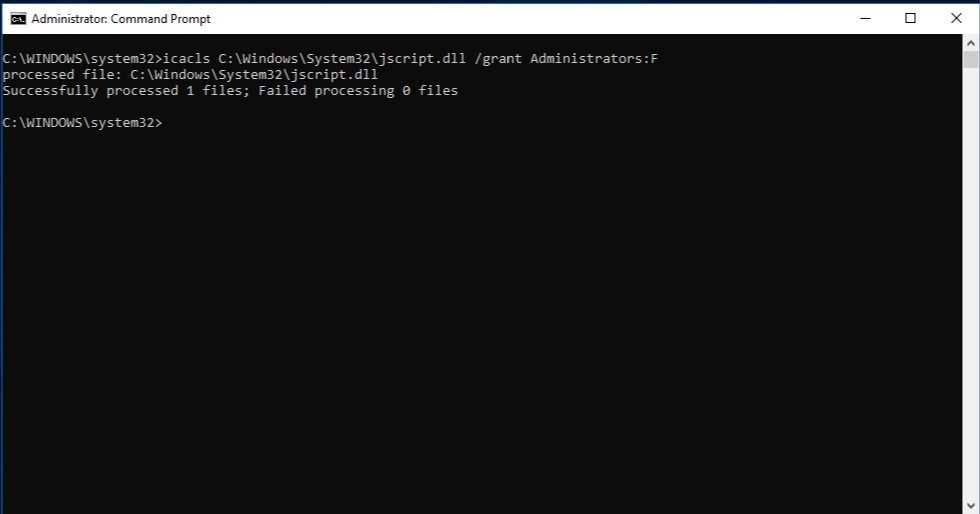
Granting Full Access Permissions
After taking ownership, grant administrators full access to the corrupted file. This is achieved using the following command:
icacls <file path and name> /grant administrators:FExample:
icacls C:windowssystem32jscript.dll /grant administrators:FThis command allows administrators to perform any action on the file, including replacing it. This level of access is crucial for completing the repair process initiated by the scan tool.
 Command Prompt with administrator rights
Replacing the Corrupted System File
Once the necessary permissions are configured, you can replace the corrupted file. Use a known good copy of the file from a trusted source, such as another computer running the same operating system version. Verify the integrity of the source file before using it for replacement. Use the following copy command:
copy <source file path and name> <destination file path and name>Example:
copy E:tempjscript.dll C:windowssystem32jscript.dllThis command copies the good file from the source location and replaces the corrupted file in the system directory. Ensure the file names and paths are accurate to avoid further issues.
Troubleshooting and Further Steps in Scan Tool Operation
If these steps don’t resolve the issue, more extensive measures might be required. Consider reinstalling Windows as a last resort to ensure system stability. Refer to Microsoft’s documentation for detailed instructions on recovery options: Recovery options in Windows. Successfully mastering scan tool operation can significantly improve your ability to diagnose and fix system errors. Remember to always back up important data before making significant system changes.